A few months ago I was lucky enough to try a bottle of Chockwork Orange from the Brentwood Brewing Company.
This is a fairly strong old style dark ale with added oranges. It has some nice roasted malt flavours and this along with the bitterness helps to create a chocolate flavour which is enhanced by a fantastically fresh aroma and taste of fresh oranges.
I was impressed with the beer and decided to do my own take on it by trying to add the orangey-ness to my existing Dark Dog Porter recipe to make a Chocolate Orange Porter.
At the time of trying the Chockwork Orange the brewers mentioned that whole oranges were added to the boil. Armed with this knowledge I set about attempting to brew a passable Chocolate Orange Porter style brew.
The recipe was as follows:
Fermentables
Pale Malt (5EBC) 86.3%
Crystal Malt (130EBC) 4.4%
Wheat Malt (3.5EBC) 2.8%
Chocolate Malt (1050EBC) 2.8%
Malted Oats (3.5 EBC) 2%
Roasted Barley (1350EBC) 1.7%
Hop Schedule
Golding (5.2%AA) 90mins 52g
Golding (5.2%AA) 5mins 10g
Fuggle (3.8%AA) 0mins 10g
Other
Bitter Dried Orange Peel @5mins 20g
4 x Sweet Oranges (quartered) @ 3 mins
Yeast
Safale S-04
Info
Brew Length: 19L
OG 1.056
FG 1.014
Bitterness: 35 EBU
Colour: 114 EBC
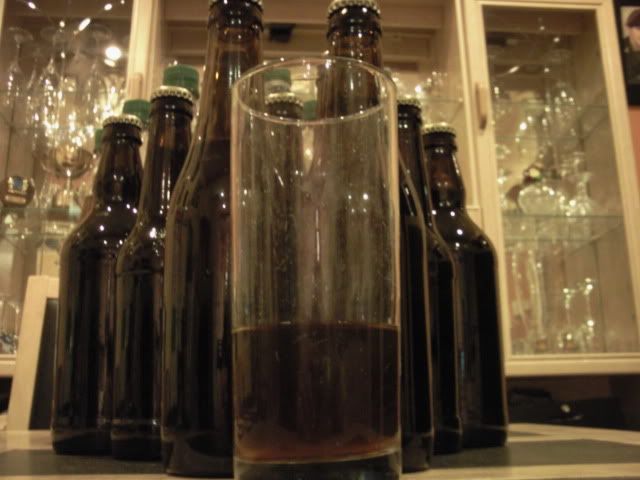
This was 10 days in the primary fermenter and a sample was promising but lacked any orangey aroma so I made up an orange infusion by grating the rind of 2 oranges into a cafetiere with 100ml or so of boiling water and left to cool. This was then added to a second FV which the beer was then racked into.
I'm planning on kegging / bottling this one today and hopefully this will turn out as an interesting Christmas drink.
Monday, 22 November 2010
Sunday, 21 November 2010
Riggwelter Revisited
A while ago I blogged about a recipe for Black Sheep Riggwelter. It didn't turn out so well so I thought I should try again. I went back to the Black Sheep interview and found that I had made a few errors when jotting down the information last time which meant my recipe was slightly out.
I came up with the following revised recipe....
RIGGWELTER (v.2)
19L Brew length
Fermentables:
Pale Malt (Marris Otter) 82% (3940g)
Torrefied Wheat 9% (430g)
Crystal Malt - Standard 5% (240g)
Pale Chocolate Malt - 550EBC 4% (190g)
Hops
Challenger - 7.6%AA 90 Mins (22g)
Progress - 5% AA 90 Mins (22g)
Golding - 5.7%AA 5Mins (18g)
OG: 1.056
Bitterness: 35 IBU
Colour: 63 EBC
I mashed using water profiled for a bitter (for my water adding 2tsp Gypsum, 3/4 tsp Calcium Chloride to mash and 1/4 tsp Magnesium Sulphate and 1/8 tsp of salt to the boil).
The mash and boil were 90 mins a piece and I batch sparged.
I pitched Nottingham yeast (even though it didn't seem to be right when I rehydrated it). Indeed the yeast was a bit of a dud - it took nearly 48hrs to get started and then it needed a bit of encouragement to keep going to the expected FG.
The fermentation finished but took just over 2 weeks so this may have effected the end result slightly and I didn't have high hopes for this one. The aroma is rather strange and the tastes from the trial jar were not that promising.
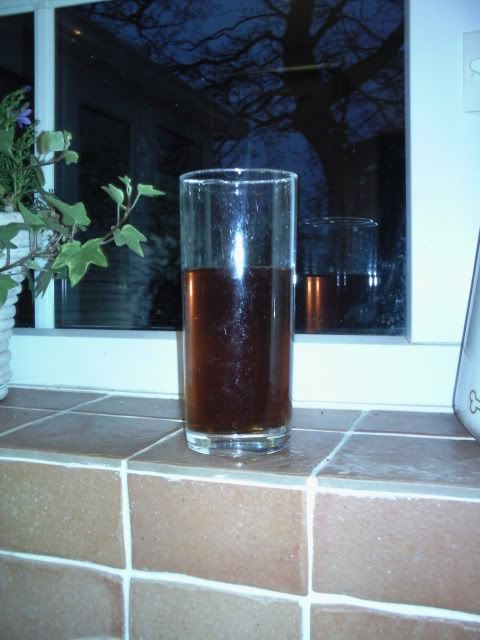
It's now about a week into conditioning so still early days but I decided to buy a bottle of the real thing and do a back to back comparison with my recipe. The results are really rather good and I think the recipe is pretty accurate.
 The colour is pretty much spot on - obviously the shop bought example is very clear and bright whereas mine has some haze still.
Other than that they taste very similar. Mine is much fresher and still needs some time to condition to balance the flavours a bit but you still get the fruitiness that you get from Riggwelter with a strong sweet raisin hit in the mouth with an almost treacle malt flavour giving way to a rounded bitterness with some lingering roast flavours.
I've made clone recipes in the past and although they have been "in the style of" the beer they were intended to mimic they have never come as close to the real thing as this one has. In fact I'd say mine is better than the shop bought but then I find that most shop bought ales are not a patch on the real thing - often containing metallic flavours that mask the hops and malt that should be there.
This is a very satisfying winter warmer ale (and not a session beer) that I'll definitely be brewing again in the future. Next time I will probably dry hop it and think about using a Yorkshire Ale yeast too.
I came up with the following revised recipe....
RIGGWELTER (v.2)
19L Brew length
Fermentables:
Pale Malt (Marris Otter) 82% (3940g)
Torrefied Wheat 9% (430g)
Crystal Malt - Standard 5% (240g)
Pale Chocolate Malt - 550EBC 4% (190g)
Hops
Challenger - 7.6%AA 90 Mins (22g)
Progress - 5% AA 90 Mins (22g)
Golding - 5.7%AA 5Mins (18g)
OG: 1.056
Bitterness: 35 IBU
Colour: 63 EBC
I mashed using water profiled for a bitter (for my water adding 2tsp Gypsum, 3/4 tsp Calcium Chloride to mash and 1/4 tsp Magnesium Sulphate and 1/8 tsp of salt to the boil).
The mash and boil were 90 mins a piece and I batch sparged.
I pitched Nottingham yeast (even though it didn't seem to be right when I rehydrated it). Indeed the yeast was a bit of a dud - it took nearly 48hrs to get started and then it needed a bit of encouragement to keep going to the expected FG.
The fermentation finished but took just over 2 weeks so this may have effected the end result slightly and I didn't have high hopes for this one. The aroma is rather strange and the tastes from the trial jar were not that promising.
It's now about a week into conditioning so still early days but I decided to buy a bottle of the real thing and do a back to back comparison with my recipe. The results are really rather good and I think the recipe is pretty accurate.

Other than that they taste very similar. Mine is much fresher and still needs some time to condition to balance the flavours a bit but you still get the fruitiness that you get from Riggwelter with a strong sweet raisin hit in the mouth with an almost treacle malt flavour giving way to a rounded bitterness with some lingering roast flavours.
I've made clone recipes in the past and although they have been "in the style of" the beer they were intended to mimic they have never come as close to the real thing as this one has. In fact I'd say mine is better than the shop bought but then I find that most shop bought ales are not a patch on the real thing - often containing metallic flavours that mask the hops and malt that should be there.
This is a very satisfying winter warmer ale (and not a session beer) that I'll definitely be brewing again in the future. Next time I will probably dry hop it and think about using a Yorkshire Ale yeast too.
Thursday, 16 September 2010
Those Yeastie Beasties
In the last few weeks I have been brewing a Red Ale for a small brewing competition. My chosen recipe style was an Irish Red Ale and with this in mind I had ordered a Wyeast Irish Ale yeast. Now normally with liquid yeasts I would take time to grow the yeast on and split it so I get a bit more value for money. Unfortunately this time I was a little unprepared and ended up pitching directly from the Activator bag - a double shame because I'll be making a Four Shades of Stout next and really wanted to use Irish Ale yeast for that one too.
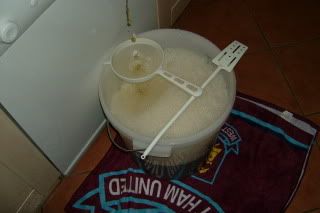
So, when it was time to rack off my Red Ale into a secondary fermenter for finishing and dry hopping, I decided I'd give reclaiming and washing the yeast from the trub.
To do this I first sterilised a couple of 500ml PET bottles and a jug. I then boiled and cooled a few 100mls of water to add to the yeast cake to get it into solution. The boiling of the water helps to drive off the oxygen which might be used by the yeast for aerobic action and also sterilises the water ready for use.
Once the water cooled to below around 24oC I poured it into the fermenter and swished it around a bit. I then jugged about 300mls of the liquid into one of the PET bottles, popped the lid on and left in the fridge for about 60 mins to allow the heavier trub to settle out whilst the yeast remained in suspension in the liquid.
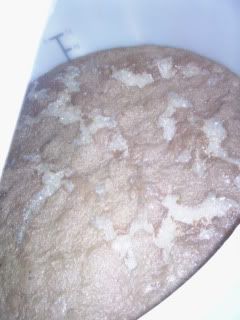
At this stage it was just a case of gently pouring the top half of the liquid containing the yeast into the second bottle where it can be capped and put back into the fridge until it's settled out properly. Once settled you should see a nice white / creamy yeast deposit at the bottom. If it still looks contaminated by trub then you can repeat the process of rinsing the yeast and pouring off the debris.
What I ended up with looked like this.

Once collected this will keep in the fridge for a while. To use it, take it out of the fridge a few days before it's needed to gradually stabilise the temperature and so there is enough time to make a yeast starter.
I'm planning on using this one at the weekend so here is how I went about making a starter with it.
First of all, clean and sterilise everything that is being used really well. I'm bottling and kegging as well which is why there is more equipment.
I heat about 300ml of water up to around 50oC to allow me to dissolve 40gms of Light Dried Malt Extract into it.
 This extract liquid is zapped in the microwave for about 60secs (until it's boiling). This will sterilise the extract liquid.
The boiled liquid is cooled in a pan of icy water to get back down to around 22oC.
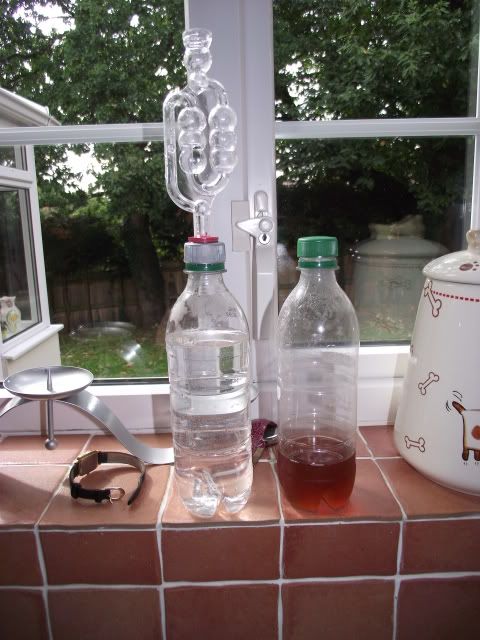
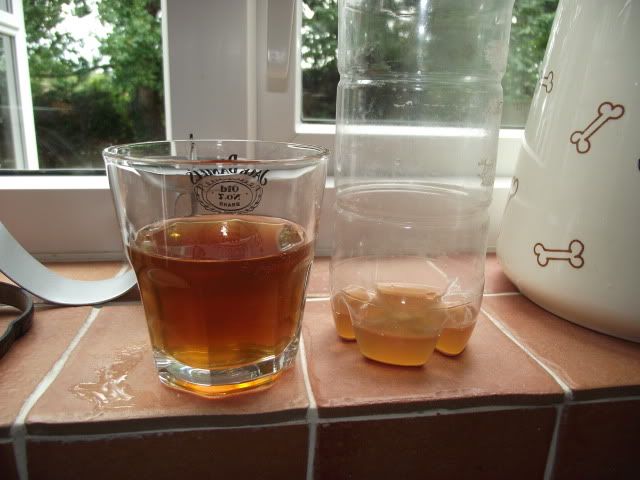
In the meantime I am preparing the yeast for use. First of all I pour off the excess liquid into a glass. This gives me a chance to smell it and to taste it to make sure there are no signs of an infection.
This one is ok and ready to go. One last job I wanted to do is to bodge a bottle cap so I can use my airlock with it.
And job done - I used a few drill bits and a file to make a hole in the cap so I could fit the rubber grommet in for the airlock to go into. This will come in very useful for the future. Previously I have just used a normal cap loosely fitted so any gases can be released.
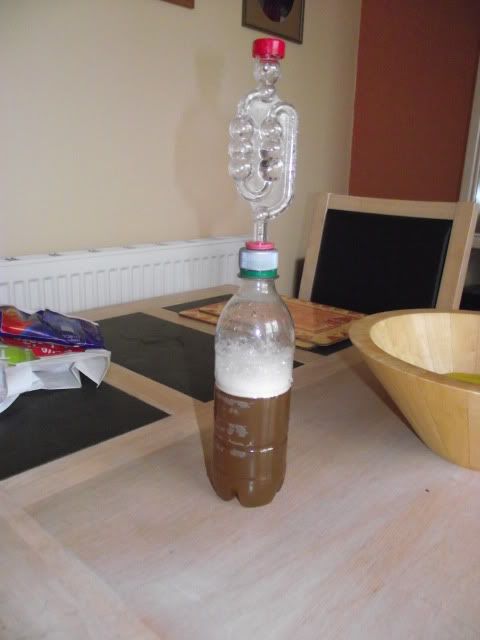
I then pour the extract liquid into the yeast bottle and shake well. This gets the yeast off the bottom and into suspension as well as getting some air into it to help the yeast to grow.
Finally I pour the yeast liquid into the new sterilised bottle and cap it with my new airlock cap. This then goes to a warm place for 24-48 hours before being ready for pitching.
There are other methods for reusing, washing and splitting yeasts out there and this is just the way I've done it. I'm looking forward to a decent brew day and pitching a viable and healthy yeast - hopefully ;)
UPDATE: The yeast starter was probably made up a little early and next time I'd probably only make it about 24 hrs before. However, I pitched the yeast starter in my Four Shades Of Stout and there was a good yeast crust within 12 hours of pitching.
So, when it was time to rack off my Red Ale into a secondary fermenter for finishing and dry hopping, I decided I'd give reclaiming and washing the yeast from the trub.
To do this I first sterilised a couple of 500ml PET bottles and a jug. I then boiled and cooled a few 100mls of water to add to the yeast cake to get it into solution. The boiling of the water helps to drive off the oxygen which might be used by the yeast for aerobic action and also sterilises the water ready for use.
Once the water cooled to below around 24oC I poured it into the fermenter and swished it around a bit. I then jugged about 300mls of the liquid into one of the PET bottles, popped the lid on and left in the fridge for about 60 mins to allow the heavier trub to settle out whilst the yeast remained in suspension in the liquid.
At this stage it was just a case of gently pouring the top half of the liquid containing the yeast into the second bottle where it can be capped and put back into the fridge until it's settled out properly. Once settled you should see a nice white / creamy yeast deposit at the bottom. If it still looks contaminated by trub then you can repeat the process of rinsing the yeast and pouring off the debris.
What I ended up with looked like this.
Once collected this will keep in the fridge for a while. To use it, take it out of the fridge a few days before it's needed to gradually stabilise the temperature and so there is enough time to make a yeast starter.
I'm planning on using this one at the weekend so here is how I went about making a starter with it.
First of all, clean and sterilise everything that is being used really well. I'm bottling and kegging as well which is why there is more equipment.
I heat about 300ml of water up to around 50oC to allow me to dissolve 40gms of Light Dried Malt Extract into it.
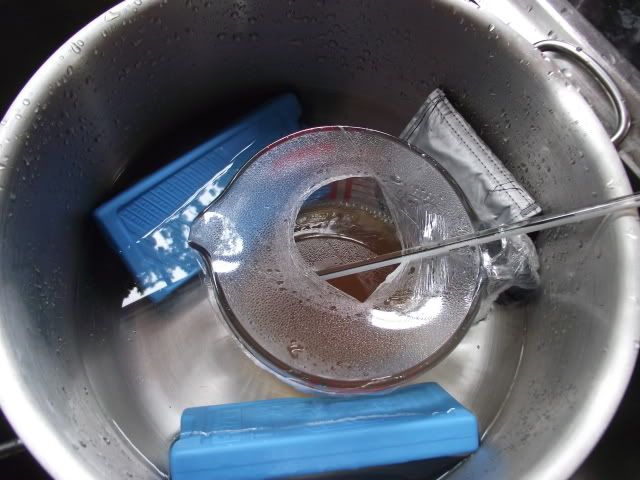
The boiled liquid is cooled in a pan of icy water to get back down to around 22oC.
In the meantime I am preparing the yeast for use. First of all I pour off the excess liquid into a glass. This gives me a chance to smell it and to taste it to make sure there are no signs of an infection.
This one is ok and ready to go. One last job I wanted to do is to bodge a bottle cap so I can use my airlock with it.
And job done - I used a few drill bits and a file to make a hole in the cap so I could fit the rubber grommet in for the airlock to go into. This will come in very useful for the future. Previously I have just used a normal cap loosely fitted so any gases can be released.
I then pour the extract liquid into the yeast bottle and shake well. This gets the yeast off the bottom and into suspension as well as getting some air into it to help the yeast to grow.
Finally I pour the yeast liquid into the new sterilised bottle and cap it with my new airlock cap. This then goes to a warm place for 24-48 hours before being ready for pitching.
There are other methods for reusing, washing and splitting yeasts out there and this is just the way I've done it. I'm looking forward to a decent brew day and pitching a viable and healthy yeast - hopefully ;)
UPDATE: The yeast starter was probably made up a little early and next time I'd probably only make it about 24 hrs before. However, I pitched the yeast starter in my Four Shades Of Stout and there was a good yeast crust within 12 hours of pitching.
Wednesday, 16 June 2010
A break from brewing!
After a few weeks of frantic brewing activity - to get readied for the summer party season - this weekend was a welcome break and a chance to have fun with mates and try some beers crafted by commercial brewers.
The weekend started off with a trip to Bracknell and to the Comedy Cellar, South Hill Park for an evening of laughs. Before the main event starts it's a chance to relax in the sun on the patio of the Atrium Bar where we had a really good burger and chips along with a pint, all for a very reasonable £6.50.
The food has obviously been prepared from the finest ingredients and cooked to perfection. To wash it all down a pint of Fullers Chiswick, a session style ale coming in at 3.5%, it is a golden colour with a fresh hoppy taste coming through the malt. This beer is made with a mixture of Northdown and Challenger hops - my favourite varieties.
I could have stayed on Chiswick all evening, unfortunately when we get into the cellar the choice of drinks goes down hill rapidly. Now the choice is limited to the generic pumps that you see in nearly every pub and club in the highstreet now days, a choice of lager or Guinness. Oh well it was good while it lasted.
The next night it was onto Henley On Thames, the historical hometown of Brakspear Brewery. Sadly they stopped brewing here a while ago in order to concentrate on their "prime" business of running the pub chain and the brewing operations were moved under license to Wychwood brewery. The distinctive Brakspear taste is still present in all their beers and when served correctly it is very drinkable.
With this in mind we decided to watch the England match in a Brakspear pub and the Queens Head looked favourite with it's two 70 inch projected screens providing plenty of viewing experience for the thirsty footy fan. What was worrying was how the large bar was full of taps for the usual suspects - that lager and Guinness bog standard line up - but very few pumps (2 infact) were serving any sort of real ale. There were none of the regular Brakspear beers were available at all, and only two seasonal ales were being served.
I plumped for the Brakspear Pavillion, a pale ale that is produced in support of the Henley Cricket Club to pay for, and the upkeep of, a new cricket pavillion. In fact, 10p from every pint goes towards the new pavillion. And the beer itself was another pleasant pale amber ale with some nice hoppy character to it. It went down so well that during a lull in the play (probably at the point when ITV HD put an advert on just in time to miss a goal) I go back to the bar to get another, only to be told that they have now run out of both taps serving real ale and would I be interested in some lager or Guinness!
So, for me the weekend served to prove that it is becoming harder to find decent pubs that serve or put enough importance into real ales. There are still plenty of pubs out there that are serving the good stuff but it isn't the norm and these establishments have to be sought out.
I might have just been unlucky but I see it in most towns now days, every bar serving the same bland, commercially driven offering to a customer base that is more interested in getting blotto than savouring a well crafted pint.
Monday, 10 May 2010
Competition Update And Other Stuff!
My competition brew has been in secondary fermentation for over a week and I moved it into an environment where it can condition now - probably for up to a month.
 I was interested to find out what it was tasting like at this stage though. I was especially keen to try a sample that had been bottled in similar bottles to the competition beers so I could get an idea of the aroma, taste and carbonation from them.
I had bottled some of the beers in some 330ml glass bottles for this reason and on cracking one open there is a fantastic hop aroma, the taste is hoppy with a sweet maltiness and finished off by a bite of bitterness and happily the carbonation is spot on for my tastes. The only disappointment at this stage was the lack of head formation from the bottle, but I know that will improve given time.
The decision to use some chocolate malt to provide additional colour and flavour on top of the crystal malt was a good one and allowed me to use less crystal malt than in previous brews.
 So overall I an very happy with the latest incarnation of my Farwelter'd Ale. Hopefully conditioning will only improve it further!
Just over a week ago I had another brew day and decided to try the Graham Wheeler recipe for a beer in the style of Old Speckled Hen. I'd made it before as an extract brew and really wanted to revisit it now I've got more experience and have moved onto full mash brewing. I was especially keen to try the packet of Windsor yeast I had been saving. I thought the extra flavour and sweetness from the yeast would work well with the recipe.
The brew day went very well and the yeast got to work extremely quickly and kept going at a rapid pace for several days and reaching a respectable final gravity (for a medium attenuating yeast) of 1.015. The resulting beer smells and tastes fantastic but is very cloudy. I've heard that this yeast can take a while to settle out and leave the beer bright so I'm considering using auxiliary finings to help out in the keg.
 For now though I've racked it off into a secondary fermentor in a slightly cooler environment and added a handful of East Kent Goldings as dry hops. I'll leave it dry hopping until the weekend now and I'll look to keg it up and make room for the next brew day.
Happy Days!
Friday, 30 April 2010
A Long Brew Day Part 3
Fermentation and Bottling :(
We last left off with crashing the temperature of the wort in the boiler down to pitching temperature - around mid 20's oC.
I tend to leave the wort to settle so that the hops form a filter and keep most of the break material out.
 While this is happening I would sort out my yeast. This time I'm using a dry yeast and a fairly neutral one to let the hops shine. It's Danstar Nottingham yeast, which I rehydrate in a few hundred mililitres of boiled / cooled water.
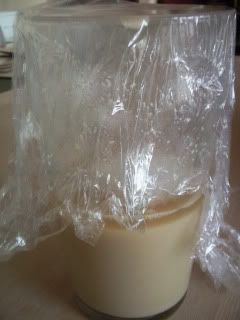
Rehydrating yeast involves sprinkling it onto the water and leaving for about 10 minutes, covered with some clingfilm. The yeast should not all sink to the bottom - if it does then suspect the health of the yeast batch. I tend to mix it back into suspension and see if it foams up after a further 15-20 mins. The clingfilm will rise and mist up if the yeast is viable. Give it a smell as well. You get an idea after a few times as to which yeasts are good or bad.
 I also tend to recirculate the first few litres of wort to come from the boiler - similar to the recirculation done at sparging stage.
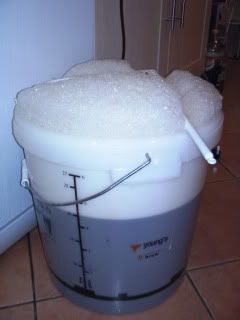 Once the wort is running clear I let if run out of the boiler at height and fall into the fermenting bin underneath. This introduces plenty of oxygen into the wort - which is key to the yeat during the initial stages where it is multiplying like crazy.
It tends to foam up a bit as a result. I'll also give it a thrashing with a beer paddle to get as much air in as possible. Do you want a flake in that? :)
 Now we're ready to pitch the yeast and put it away for fermentation. I try to ferment at a consitent 20 oC. I don't have a brewing fridge like some so I make do with moving the fermentor around or using a heating belt with a timer.
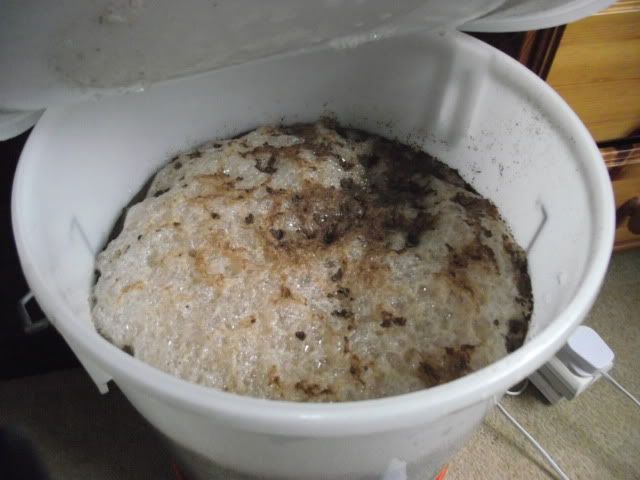
After a few hours the yeast starts to show signs of activity and evently a yeast head builds.
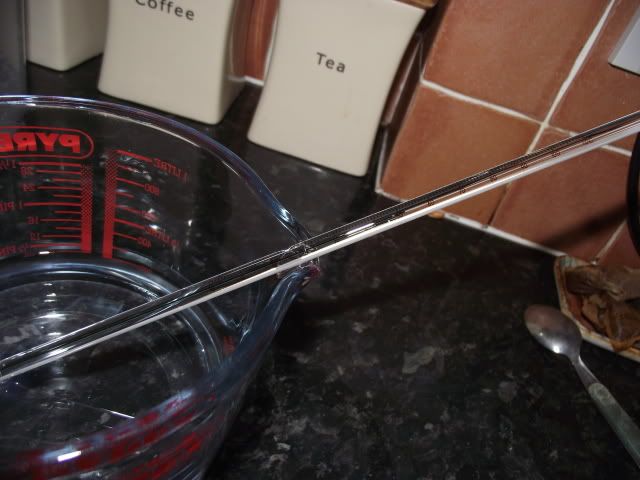
After a few days (3-5) this head dies down and the fermentation continues with less vigour. I tend to sterilise a hydromter at this point and drop it in so I can keep an eye on the specific gravity. Once down to below 1.014 and when I get 3 or more days at the same gravity then it's ready to bottle, although I leave it up to 2 weeks to allow the yeast a chance to do it's 3rd phase in the process of clearing up anything that might cause off flavours in the final beer.
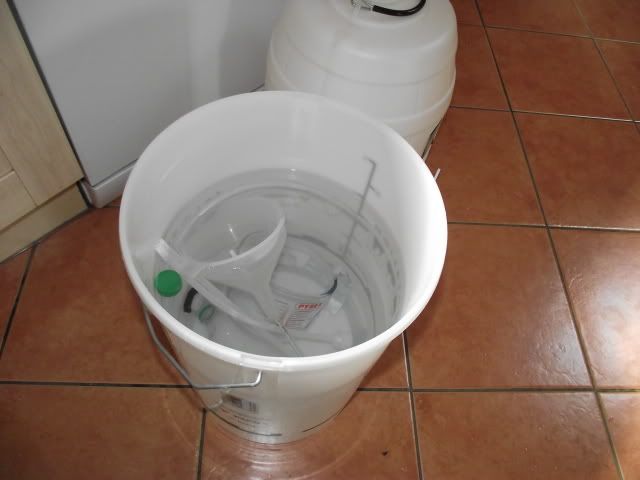
 Normally I keg most of the beer and bottle some. This time it's a competition brew so it's going in a mixture of bottles - 330ml glass. 500ml glass and 1ltr PET. This is a long process which I never look forward to. First they all need sterilising, then rinsing then priming.
Now I take a sample and then start filling the bottles.
The hop falvour and aroma is excellent with this brew. It is fairly clear and a reddish colour. Not as bitter as I thought - at least not a harsh astringent type of bitterness - which is good and what I was hoping for. It can only improve from now on and there is plenty of conditioning time before I need to send these off.
So it's wait a few weeks now and then have a sample to see how it's progressing. First samples suggest that this could be good but we'll have to wait and see!
We last left off with crashing the temperature of the wort in the boiler down to pitching temperature - around mid 20's oC.
I tend to leave the wort to settle so that the hops form a filter and keep most of the break material out.
While this is happening I would sort out my yeast. This time I'm using a dry yeast and a fairly neutral one to let the hops shine. It's Danstar Nottingham yeast, which I rehydrate in a few hundred mililitres of boiled / cooled water.Rehydrating yeast involves sprinkling it onto the water and leaving for about 10 minutes, covered with some clingfilm. The yeast should not all sink to the bottom - if it does then suspect the health of the yeast batch. I tend to mix it back into suspension and see if it foams up after a further 15-20 mins. The clingfilm will rise and mist up if the yeast is viable. Give it a smell as well. You get an idea after a few times as to which yeasts are good or bad.
I also tend to recirculate the first few litres of wort to come from the boiler - similar to the recirculation done at sparging stage.It tends to foam up a bit as a result. I'll also give it a thrashing with a beer paddle to get as much air in as possible. Do you want a flake in that? :)
After a few hours the yeast starts to show signs of activity and evently a yeast head builds.
After a few days (3-5) this head dies down and the fermentation continues with less vigour. I tend to sterilise a hydromter at this point and drop it in so I can keep an eye on the specific gravity. Once down to below 1.014 and when I get 3 or more days at the same gravity then it's ready to bottle, although I leave it up to 2 weeks to allow the yeast a chance to do it's 3rd phase in the process of clearing up anything that might cause off flavours in the final beer.
Now I take a sample and then start filling the bottles.
The hop falvour and aroma is excellent with this brew. It is fairly clear and a reddish colour. Not as bitter as I thought - at least not a harsh astringent type of bitterness - which is good and what I was hoping for. It can only improve from now on and there is plenty of conditioning time before I need to send these off.
So it's wait a few weeks now and then have a sample to see how it's progressing. First samples suggest that this could be good but we'll have to wait and see!
Thursday, 29 April 2010
Black Sheep Interview
I stumbled across this podcast by the Brewing Network today. It takes a while to get going but at about 15mins 40 secs into it there's an interview with the head brewer from the Black Sheep Brewery.
There's some history of the brewery and a description of the Riggwelter Ale before they get into a discussion around brewing technique including mash and hop schedules and the grain bill.
This is what I managed to gleam from the interview:
OG = 1.056 (ABV ~5.7-5.9%)
EBC = 60
IBU=35
Base hops in all Black Sheep beers appear to be a mix of Challenger, Progress and Fuggles, with a large (upto 70%) late hop addition of EKG hops. When they say late hops these are hops that are scalded in the hop back at the end of the boil and are mostly for aroma and flavour and not for bittering.
It was suggested that the grain bill was something like Pale Malt - Marris Otter (80%), Standard Crystal (6%), Pale Chocolate Malt (I'm sure he said 5EBC but the lowest chocolate malt I could find was still around 500EBC) (5%?), and the remainder was Torrefied Wheat. No syrups or caramel is used.
Mash temperature is 66 oC but interestingly (due to the slow speed of mash run off) it's only held there for 45 mins.
I had a play with this but couldn't quite get the numbers to add up but I came up with something that might be a close representation.
I might have to give this a try some time. When I do i'll be sure to report the results.
There's some history of the brewery and a description of the Riggwelter Ale before they get into a discussion around brewing technique including mash and hop schedules and the grain bill.
This is what I managed to gleam from the interview:
OG = 1.056 (ABV ~5.7-5.9%)
EBC = 60
IBU=35
Base hops in all Black Sheep beers appear to be a mix of Challenger, Progress and Fuggles, with a large (upto 70%) late hop addition of EKG hops. When they say late hops these are hops that are scalded in the hop back at the end of the boil and are mostly for aroma and flavour and not for bittering.
It was suggested that the grain bill was something like Pale Malt - Marris Otter (80%), Standard Crystal (6%), Pale Chocolate Malt (I'm sure he said 5EBC but the lowest chocolate malt I could find was still around 500EBC) (5%?), and the remainder was Torrefied Wheat. No syrups or caramel is used.
Mash temperature is 66 oC but interestingly (due to the slow speed of mash run off) it's only held there for 45 mins.
I had a play with this but couldn't quite get the numbers to add up but I came up with something that might be a close representation.
| |||||||||||||||||||||||||||||||||||||||||||||||||||||||||||||||||||||||||||||
| It's in the right sort of region. Looking at it Graham Wheeler has a recipe for this in his book, although it's missing the big aroma hop hit at the end and includes some sugar (maybe to fill the gap that I had problems filling. | |||||||||||||||||||||||||||||||||||||||||||||||||||||||||||||||||||||||||||||
Subscribe to:
Posts (Atom)


.png)


