Search This Blog

Friday, 13 April 2012

Like Busses

Brewdays are like busses.... well they are for me at the moment. You wait for months without having time to fit one in and then 3 come along at once!

Not quite at once then, but I have had the chance to brew 3 times in the last 6 weeks. Just in time too. I had run out of home brewed ale and was having to rely on the odd bottle from the shops, having not brewed since the beginning of December 2011. I even considered putting a kit or two on.

Things have changed since that December brew day too. Anglian Water have issued their first hose-pipe ban in around 20 years so I was worried about how to handle a brew day without the use of hoses to move the water around.

Filling the HLT was the first hurdle but that's an easy one to overcome. I simply half fill the HLT from the tap before moving into position and then filling to the required level using a spare bucket.

The next issue then is being able to cool the wort at the end of the boil. Of course I could leave it to cool overnight, with the inherent risks of infection (bacterial and/or wild yeast). And then there is the concern that without the crash cooling the cold break will not be secured.

I realise that there are plenty of brewers out there that don't bother with chilling the boiled wort and still make excellent beer but I won't be one of them.

No, I still want to cool using my immersion chiller.

In the end I bought a cheap pond pump from Amazon and used this with a load of ice to pre-chill the water.

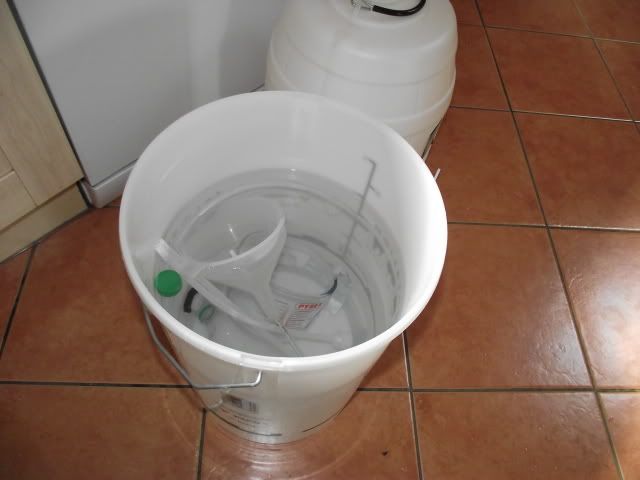
I fill up a fermenting bin with water from a water butt and then add litre bottles of ice for the last 30 minutes or so of the boil. The chiller goes into the wort for the last 15-20 minutes as usual to kill off any nasties and then the pump is switched on when the boiler is switched off.

So, the wort is cooled to 24°C from the rolling boil within the hour - actually more like 40 mins.

IC run from pump using pre-chilled water.

So, what did I brew? The first brew day was a clone of Brentwood Brewery's excellent Lumberjack. This is one I'd definitely do again at some point.

The second brew day was inspired by the very unseasonal hot weather we were having. I went for a tweaked version of the summer favourite, Way to Amarillo, or in this case, Another Way to Amarillo.


Name: Another Way to Amarillo


Type: All Grain
Style: American Pale Ale

Batch size: 19.00 ltrs
Boil size: 26.00 ltrs
Boil Time: 90 min
Efficiency: 75%

Est. OG: 1.049 SG
Est. FG: 1.010 SG
Est. ABV: 5.10 %
Est. Colour: 14.5 EBC
Est. Bitterness: 44.2 IBU

Fermentables
Amount Type Colour
3300.00 gm Pale Malt, Maris Otter 5.9 EBC
250.00 gm Caramunich 100.5 EBC
200.00 gm Wheat, Torrified 3.9 EBC
200.00 gm Caramalt 29.6 EBC

Hops
Amount Hop Type Alpha Acid % Time Use
30.00 gm Amarillo 9.00%AA 90 min Boil
15.00 gm Amarillo 9.00%AA 15 min Boil
10.00 gm Amarillo 9.00%AA 5 min Boil
30.00 gm Amarillo 9.00%AA 0 min Aroma


Yeast
Safale US-05

Mashed @ 66°C for 90mins using a General water profile. This one smelt awesome in the FV and is just about ready to bottle now.


The actual OG was slightly down due to collecting slightly too much wort but still consistent with my 75% efficiency target.

I was originally going to dry hop this one but have decided that there is already plenty of aroma and flavour in this one.

The weather then proceeded to take a turn for the worst - this has got to be the wettest drought on record!

I decided to revisit an old favourite of mine. A tweak to the Far Weltered recipe. This is a dark ale using traditional English hops but I've never been quite happy with the balance of the beer. This time I still boiled for 90 minutes to secure the hot break but piled in the hops towards the end of the schedule. I also reduced the IBU's, aiming for a more balanced and fuller bodied finish to the beer. Only time will tell!


Name: Far Weltered Ale (Mk4)


Type: All Grain
Style: English Bitter

Batch size: 19.00 ltrs
Boil size: 26.00 ltrs
Boil Time: 90 min
Efficiency: 75%

Est. OG: 1.046 SG
Est. FG: 1.013 SG
Est. ABV: 4.30 %
Est. Colour: 24.7 EBC
Est. Bitterness: 34.00 IBU

Fermentables
Amount Type Colour
3200.00 gm Pale Malt, Maris Otter 5.9 EBC
400.00 gm Crystal Malt 118.3 EBC
100.00 gm Wheat, Torrified 3.9 EBC
35.00 gm Black Malt 1300.2 EBC

Hops
Amount Hop Type Alpha Acid % Time Use
55.00 gm Fuggles 3.8%AA 60 min Boil
30.00 gm Fuggles 3.8%AA 15 min Boil
20.00 gm Fuggles 3.8%AA 5 min Boil
10.00 gm East Kent Goldings 5.0%AA 0 min Aroma


Yeast
Safale S04

Late Aroma hops added @85°C

Clear wort and targets hit
This time the wort collected and OG is as expected.

With this one I had intended to mash at a slightly higher 68°C but messed setting the temperature up and ended up with a reasonable 66°C.

My biggest worry from the last few brews is that the mash tun seems to be losing a few more degrees centigrade than it used to over a 90 minute mash. It might be because I've managed to damage the cool box casing, introducing a couple of small holes in it. For now I think I'll just wrap it up more during the mash and see how it goes.

Thursday, 5 January 2012

UK National Homebrew Competition

The UK National Homebrew Competition for 2012 has recently been announced.

This one completely missed my radar until after the closing date for entries last year so I missed out but from what I understand is was a very well supported competition.

What I particularly like about this one is that all entries receive a judges score sheet and feedback within a week or so of judging. It is always very useful to receive constructive criticism on our home brewing efforts and I believe is a key step in progressing as a brewer or brewster.

The competition opens for registration from 1st January 2012 and registration then closes 8th September 2012.

Entries can be received from 20 August 2012 through 7 September 2012.

Judging will be 15 September 2012 at a location to be confirmed. Prizes will then be awarded from 4pm.

The judging is based on BJCP 2008 categories with the best beers in each category being entered for a chance to win best of show.

It is also possible for clubs to win awards by accruing points from individual entries.
All the information for the competition is available here.

Lets hope for continued good support for brewing competitions like this one.

Happy Brewing!

Wednesday, 4 January 2012

Lazy Brew Day - Update

So, if you read  my last post you'll also know that recently I brewed a full mash kit, designed and packaged by a real micro brewery.

The Fulstow Brewery Fulstow Common is a copper coloured session bitter that comes in at around 3.8% ABV.

As I wrote before, the kit was very well put together and good value for money. The fermentation went well and I bottled the beer about a week ago.

One week in the bottle, even for AG brewing, is quite soon to be sampling but I was keen to try it out and see if it in anyway matches what I would normally drink at the pub. I have got to say that it does, although it could do with a few more weeks to mature and come into condition.

The carbonation levels at the moment are quite low and the lack of conditioning can be seen from the pitiful, almost non-existent head on the beer at the moment. However this I am sure will improve given time.

At this stage it definitely gives hints of the commercial beer but lacks a bit of that rounded flavour that comes in a well conditioned beer. At the moment it is still possible to pick out some of the flavours which are still very distinct and haven't blended together like they should but even now it resembles the beer that I can buy from the brewery tap on any night of the week.

Given another week in secondary fermentation and then a few weeks at cellar temperatures then this should be spot on. I think the outcome of this "kit" has been much better than I had hoped for. Although the instructions accompanying the kit were comprehensive and detail, the scaling down of a commercial recipe and the brewing of that recipe on home brew equipment can be difficult to get right.

The other factor is that people brew using different processes. I ignored some of the instructions on the kit so I could brew using my usual process, including my own water treatment, mash schedule and brew length.
The reason for doing this is that I know from experience that it's the process works best on my setup and produces predictable results. The instructions provided would work just as good for anyone that is just starting out in their AG brewing journey and is uncomfortable in winging it with their own process.

For the beer to have turned out as good as it has it testament to the time and thought that must have gone into designing and producing this full mash kit. I would certainly recommend any of the kits in this range to any home brewer, whatever their level of experience or expertise.

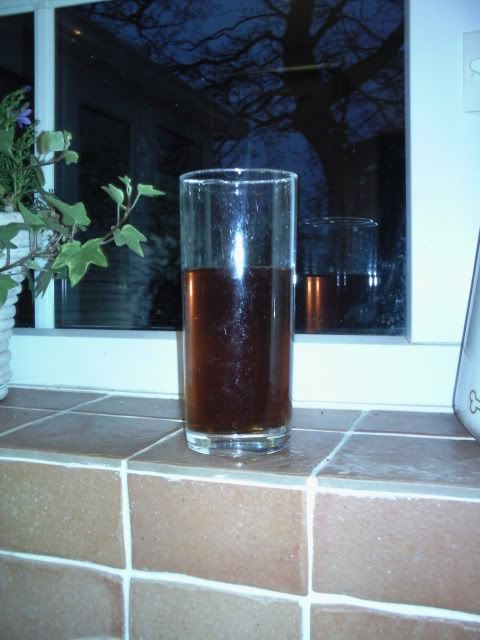
All that is left for me to do is to sign off with a picture of the beer. Ok.... my brewing is better than my photography (and indeed my writing).

Happy Brewing!

Thursday, 22 December 2011

Lazy Brew Day

Due to being busy with work and family commitments I've found it difficult to fit in any brew days for a few months now - since mid-September in fact.

I managed to fit in an emergency brew day a few weeks ago to stock up for Christmas, brewing an old favourite that I knew would be ready for drinking in a short space of time.

Today is my first day of the Christmas holidays and felt it time to put another brew on ready for the New Year. Again I didn't want to do anything adventurous and wanted something tried and tested that would get me ready for more experimental stuff after Christmas.

I decided to go for a Full Mash "kit". The last time I did one of these it was the Brupaks London Bitter kit which turned out wonderfully as it was my first attempt at a full mash beer. All the ingredients were measured out and packaged in a kit with some instructions. The only down side was that the instructions were rather generic and it wasn't made clear as to what the hop schedule should be.

My local micro brewery pub is Fulstow Brewery's Gas Lamp pub so I was interested to find that they sold kits of their beers at the local home brew shop. All of these kits are based on the breweries commercial beers, be it regular beers like Fulstow Common (my favourite) or one-off special beers like Wafty Crank.

The kits themselves are very well put together. They contain all the ingredients required (Grain and hops), the yeast, yeast nutrient, and a sachet of protofloc. It also comes with a set of very detailed instructions which would be particularly useful for an inexperienced brewer.

Everything is individually packaged and clearly labelled. The hops are separated into bittering and aroma and the instructions explain very clearly what should be done and when. The hops come in hop bags in case the brewer doesn't have a hop filter and can be dropped in inside the bag or emptied out into the boiler to do their thing as nature intended.

The kits themselves are very reasonably priced - especially considering the quality of the kit and the contents provided. It is based on a brew house efficiency of about 80% which I don't have a problem achieving but it might be a consideration for anyone new to AG brewing.

At the end of the brew day I've ended up with 23 ltrs of wort at an OG of 1.038. So here's some pictures of the days events.


Preparing the brewing liquor - 31ml of CRS to reduce the residual alkalinity to around 50ppm CaCO3

2tsp Gypsum & 3/4 tsp Calcium Chloride

My brewery.... Tidy isn't it :p

Mashing in

Mash set at 65oC (as per instructions guv'). Mash is for 60mins today.

Sparge run off

The hop shot!

Mmmmm malty smooth

Nearly there

....and rest.

An alien life form?

Spot on 1.038 - Huzzah!

Break material dropping clear.
All in all a successful and enjoyable day of brewing without the normal messing with scales and weighing.

Happy days!

Wednesday, 10 August 2011

The Great British Homebrew Challenge 2011

Homebrewing beer has come a long way over the years. All Grain brewing is becoming more and more popular.  I think the age of technology and the interweb have all played their part in helping this brewing explosion in peoples kitchens, garages, gardens and even the odd shed or two.

Most home brewers can produce quality beers on mostly cobbled together equipment, trying to emulate the ever expanding craft and micro brewers throughout the country, many of whom also started off brewing as a hobby.

One thing that all home brewers like is constructive feedback on their beers, allowing for a never ceasing circle of continuous improvement to process and a better understanding of how to brew really great beers. It is a fantastic hobby to get involved in and has it's rewards at the end - being the end product that can be shared (with friends, family and even strangers via the brew exchange) or kept for personal enjoyment.

Another way of recieving feedback on beers is to enter brewing competitions. However, over the last few years I've realised that the main problem with the success of home brew competitions is the size of the entry, and also the large national competitions are few and far between. Yes, there are national competitions run on a small scale from Internet forums like the Brew Exchange but these never receive a huge amount of interest and eventually after a few competitions the interest seems to die completely.

So it's with a certain amount of excitement that I am now planning for possibly 3 entries into The Great British Homebrew Challenge 2011. Being run by the award winning Thornbridge Brewery in conjuntion with Nicholsons Pubs. There are cash prizes for best in each category with the overall winner being selected by Nicholsons Pubs to be brewed by Thornbridge and served as a beer nationwide in the pub chain.

So now I have some decisions to make. I can enter up to 3 separate categories. Unfortunately 2 of the I'm currently thinking of brewing fall into the same category so I think I need to do some playing around in Beersmith 2. Still, it keeps me off the streets! ;)

So come on fellow homebrewers out there. Don't be afraid to get stuck in. Let's make this homebrew competition a success. Show off your beer and be proud of crafting a quality product from an enjoyable and friendly hobby.

Saturday, 6 August 2011

Wolds Bitter

A while back now I blogged about doing an Ordinary Bitter. it was a case of having most other styles sorted in terms of my own house recipes except for a standard, session bitter.

The brew started off well, hitting all the numbers on the brew day but then I started having yeast issues in fermentation. The liquid yeast I pitched first just didn't get going so eventually I repitched with some Windsor yeast. The Windsor yeast did the job but when the beer went into secondary it was looking a bit on the murky side.

To cut a long story short, it took an age to clear and wasn't tasting that good. Finally in the last few weeks it has dropped bright and clear and the flavour has been transformed. I designed the recipe to have some of the fruity flavours that you get in a Riggwelter but in a smaller beer and with more bitterness.

Although I wanted a smaller beer I still wanted it to have somebody and balance about it. So here it is - weighing in at about 3.8% ABV with a bitterness of around 35 IBUs.


I'll definitely rebrew this but next time with a yeast that'll get to work on it straight away. Maybe Thames Valley liquid yeast or even a Nottingham dried yeast.


Tuesday, 26 July 2011

Dark Dog Coffee Stout

My last post mentioned plans for a coffee stout using a cold infusion of ground coffee.
I brewed a robust stout based loosly on a couple of old favourites of mine. Once this was finishing primary fermentation I racked it off to a secondary fv on top of the cold coffee infusion that I had prepared a few days before in the fridge.
Before adding the coffee infusion I filtered the coffee grains using a paper filter.
Allof this went into bottles for freshness.
Early samples were a bit poor. There was some harshness to the beer and a strange aftertaste from the coffee. However, given some conditioning time and this has transformed into an extremely drinkable beer.
It pours dark black with a light carbonation with an off white, almost brown, but creamy head which lasts down the glass.
The coffee compliments the roastiness of the beer and the bitterness is about right for my tastes.
Don't get me wrong though. This is not a subtle beer. It's an assertive and complex pint that can fullfill my desire for coffee and beer in one glass.
I'll definitely consider brewing this one again.


Wednesday, 18 May 2011

A Flurry of Activity

Even writing the title to this blog entry has got my mind racing about whether trying to make a Mc Flurry beer would be a good idea or not! I'm not quite sure what has happened to me over the last few weeks in fact. Maybe I'm finally coming out of my long period of winter hibernation?

Whatever it is, it's spurred me into thinking and doing homebrew (alot!).

In fact, running out of beer the other weekend might have been partially to blame for this brewing explosion. Now I'm back to a point where I have some established regulars either conditioning or fermenting away and so my mind turns to the more experimental brews - after all that's where the old favourites started off. However experimenting has it's risks and a fair proportion of the experiments will be dropped as bad ideas and never brewed again- the odd one or too are that bad that they are a struggle to finish off.

Recently, and apart from the usual bitters and pale ales, I have brewed lager style beers but using mostly ale type ingredients and yeasts. At this time of year I can't ferment a proper lager yeast and I'm only brewing it to keep the beer guests happy. (Note to self: invest in fermentation temperature control - it's the future!).

Anyway, this morning I was hankering after a good strong black coffee to kick start the day and found that we didn't have any in the house - that's none at all - no filter, no instant, no cafetiere... nothing. Actually we do have a bag of coffee beans that I picked up by mistake thinking it was ground but having no grinder makes getting a decent cup of coffee out of it a bit difficult (I've already been spoken to about blunting the blade on the food processor and the pestle and morter just doesn't cut the mustard).

Obviously this lack of coffee was playing on my mind and so the thought of doing a Coffee Stout crept into my concience. That seed of a thought has grown all morning until I felt impelled to take this further.

So..... I decided on a base recipe for the stout. Something that already has hints of coffee in the malt profile.. This will be brewed as is but a few days before the end of fermentation I will add around 250g of ground roast coffee into a pint of cold filtered water. After stirring this up it will be kept in the fridge for 24 hrs or so before filtering and adding to the secondary fermentor ready for bottling. This cold infusion is supposed to reduce the harsh bitterness of hot coffee but allows the coffee essense to be carried across into the final beer. Well that's the plan!

To de-risk the whole thing I've designed the base recipe by "borrowing" elements from existing recipes for FSOS and my Dark Dog Porter (already based on Gadds Dogbolter recipe).

At the moment the draft version of the recipe goes something like this.

Pale (MO) Malt - 75%
Malted Oats -        4%
Torrefied Wheat -  5%
Chocolate Malt -   5%
Roast Barley -       2%
Amber Malt           5%
Carafa III Sp.        4%

Aiming for an OG of around the 1.044 mark and will mash at about 68oC using a sweet stout water profile.

I will bitter fairly low for a stout at around 35 IBUs using target and goldings with very few late hops.

I'll be sure to post an update when I brew and have tasted the results. In the meantime..... it must be about time to start planning a fruit cake Christmas ale.

Happy Days!

Saturday, 7 May 2011

Top Tips #1

A brewing friend is making his first steps into the murky world of water chemistry and treatment. This got me thinking about what I do and information I've picked up in the last year or so of brewing.

So here are some of my tips to help with this dark side of homebrew.

1] Don't worry too much about the detail. Seriously don't! Unless you have a perverse interest in the complicated chemistry then just learn the basics. There are plenty of resources and calculators on the interweb to help out.

2] Don't try to eradicate the alkalinity completely. You want some residual alkalinity remaining. The amount will depend largely on beer style - or more accurately the malt / colour profile. Darker malts have higher acidity and will remive some of the buffering effect of the alkalinity. Lager < 20, bitter 30-50, Stout / porter 100+ as a guide.

3] Don't worry if it's not spot on straight away. Although based in science there are many factors that affect the end result. These might be recipe or even equipment related. The important thing is to keep tweaking and measuring. You won't be far off.

4] Treat the brewing liquer in bulk and then run with it. Once it's mashing it's too late to make any changes. By all means take the ph measurement at the start of the mash but trying to correct something now will be hard to do and likely to get things worse. Record everything and then tweak next time.

5] Only treat the mash with calcium additions and for alkalinity. Other additions are best added to the boil only as they are detrimental to the processes in the mash.

6] The flavour profile can be changed by tweaking the sulphate / chloride ratio using Gypsum (calcium sulphate) and Calcium Chloride. More sulphate will accentuate hop flavour and bitterness, more chloride will accentuate the malt.

7] Don't be afraid to use common salt in darker beers. Don't over do it - only very small amounts are ever required but as in cooking it can enhance the flavours of the beer being produced.

Saturday, 29 January 2011

Ordinary Bitter

Over the last year I've been working on my own house recipes that I can enjoy over and over. I've got a Best Bitter (Nobbut The Best), a Porter (Dark Dog Porter), an IPA (ConDem Nation IPA), a dark old ale (Farwelter'd Ale) but no session bitter.

That is until now! I wanted to go for something in the region of 3.8% that is bitter but still retains some body and malt presence. I wanted it to be a medium dark bitter and I also wanted to use some ingredients up.

This is what I came up with.
It's a similar grain bill to my Best Bitter but I've added some Pale Chocolate malt to add another dimension. I originally got the Pale Chocolate malt for the Black Sheep Riggwelter clone and am quite impressed with the flavour it brings to the party.


I'll reserve final judgement on the recipe once it's ready to drink but I'm hoping that I won't have to tweak it too much next time and I can add this to my regular beers.

This brew day I decided to really get to know the ingredients I'm using. To do this they need to be handled, tasted and smelt. Tasting the malts and smelling the aroma from the hops. It really helps to get an idea of what the ingredients add and when to (or not to) use them.

This will be pitched with a Wyeast 1028 London Ale yeast made up to a 1L starter for 24 hours. It will ferment at 20oC for 5-7 days. I'm planning on kegging half and bottling half so it might make it into a secondary fermentation vessel for a few days before bottling.

I'm looking forward to tasting it in 4-6 weeks time!

Wednesday, 26 January 2011

Gas Lamp Lounge Pub


Something amazing happened to Louth at the beginning of December 2010. Bucking the general trend, a new pub was opened in the town which makes it the first in about 40 years. What's more is that the pub is actually the brewery tap for the local micro - Fulstow Brewery.

Fulstow Brewery is the first brewery situated in the Lincolnshire town for over 130 years. Brewing operations are based in the top floor of a two story building just off the Louth Canal on Thames Street. The building used to be the home to the Louth Gas Lamp Company which dates back to 1826. It has taken 3 years of planning and hard work to get the Gas Lamp Lounge up and running in the ground floor of the brewery building - and what a transformation! From the real wood flooring, the extensive bar, open fire and real gas lamp lighting.

This week I decided that I had left a visit to this new pub far too long and ventured down at opening time. I was genuinely surprised at how busy the place was even early on a Monday evening and the business looks to be thriving. And visitor can expect a warm welcome from the staff behind the bar and will be offered samples of the locally brewed ales to help decide what to spend money on.

The pricing regime is simple and is basically £2.40 per pint no matter what tap the beers flowing from or what the ABV is.
The choice is a good one, ranging from up to 7 regular ales with at least 1 one off 'special' on tap each week (to date that's about 230 different beers in 6 years!).

All of the range sampled tasted great but I settled to start with a pint of the Northway IPA. This was a classic type of dry IPA, pale in colour, quite bitter and dry with a hint of citrus to finish. Clean and crisp in the mouth this is a nice refreshing drink and I could have quite happily had a few more. The ABV was slightly lower than expected for an IPA at 4.2% but it was very good all the same.

Next up I tried the Fulstow Common - apparently the most popular beer on tap. This again packed a punch in terms of bitterness. It was a darker copper coloured session bitter at 3.8% but the bitterness and slight dryness was balanced nicely with a hit of malt flavour. The hoppiness was evident in the beer which was hopped with Northdown and Saaz.

The emphasis on the Gas Lamp Lounge is most definitely on fine real ales and they let the beer do the talking. They are proud to offer friendly service and great beers which can be enjoyed in good company and with good conversation, thanks in part to the fact that there are no other distractions like loud music and machines. Maybe it's this old fashioned pub atmosphere that is making the place so very popular. May it continue to enjoy success for many years!

Monday, 22 November 2010

Christmas Brew

A few months ago I was lucky enough to try a bottle of Chockwork Orange from the Brentwood Brewing Company.

This is a fairly strong old style dark ale with added oranges. It has some nice roasted malt flavours and this along with the bitterness helps to create a chocolate flavour which is enhanced by a fantastically fresh aroma and taste of fresh oranges.

I was impressed with the beer and decided to do my own take on it by trying to add the orangey-ness to my existing Dark Dog Porter recipe to make a Chocolate Orange Porter.

At the time of trying the Chockwork Orange the brewers mentioned that whole oranges were added to the boil. Armed with this knowledge I set about attempting to brew a passable Chocolate Orange Porter style brew.

The recipe was as follows:

Fermentables
Pale Malt (5EBC) 86.3%
Crystal Malt (130EBC) 4.4%
Wheat Malt (3.5EBC) 2.8%
Chocolate Malt (1050EBC) 2.8%
Malted Oats (3.5 EBC) 2%
Roasted Barley (1350EBC) 1.7%

Hop Schedule
Golding (5.2%AA) 90mins 52g
Golding (5.2%AA)  5mins 10g
Fuggle (3.8%AA) 0mins 10g

Other
Bitter Dried Orange Peel @5mins 20g
4 x Sweet Oranges (quartered) @ 3 mins

Yeast
Safale S-04

Info
Brew Length: 19L
OG 1.056
FG 1.014
Bitterness: 35 EBU
Colour: 114 EBC

This was 10 days in the primary fermenter and a sample was promising but lacked any orangey aroma so I made up an orange infusion by grating the rind of 2 oranges into a cafetiere with 100ml or so of boiling water and left to cool. This was then added to a second FV which the beer was then racked into.

I'm planning on kegging / bottling this one today and hopefully this will turn out as an interesting Christmas drink.

Sunday, 21 November 2010

Riggwelter Revisited

A while ago I blogged about a recipe for Black Sheep Riggwelter. It didn't turn out so well so I thought I should try again. I went back to the Black Sheep interview and found that I had made a few errors when jotting down the information last time which meant my recipe was slightly out.

I came up with the following revised recipe....

RIGGWELTER (v.2)
19L Brew length
Fermentables:
Pale Malt (Marris Otter)      82% (3940g)
Torrefied Wheat   9% (430g)
Crystal Malt - Standard 5% (240g)
Pale Chocolate Malt - 550EBC    4% (190g)

Hops
Challenger  - 7.6%AA     90 Mins (22g)
Progress - 5% AA  90 Mins (22g)
Golding - 5.7%AA 5Mins (18g)

OG: 1.056
Bitterness: 35 IBU
Colour: 63 EBC

I mashed using water profiled for a bitter (for my water adding 2tsp Gypsum, 3/4 tsp Calcium Chloride to mash and 1/4 tsp Magnesium Sulphate and 1/8 tsp of salt to the boil).

The mash and boil were 90 mins a piece and I batch sparged.

I pitched Nottingham yeast (even though it didn't seem to be right when I rehydrated it). Indeed the yeast was a bit of a dud - it took nearly 48hrs to get started and then it needed a bit of encouragement to keep going to the expected FG.

The fermentation finished but took just over 2 weeks so this may have effected the end result slightly and I didn't have high hopes for this one. The aroma is rather strange and the tastes from the trial jar were not that promising.

It's now about a week into conditioning so still early days but I decided to buy a bottle of the real thing and do a back to back comparison with my recipe. The results are really rather good and I think the recipe is pretty accurate.


The colour is pretty much spot on - obviously the shop bought example is very clear and bright whereas mine has some haze still.

Other than that they taste very similar. Mine is much fresher and still needs some time to condition to balance the flavours a bit but you still get the fruitiness that you get from Riggwelter with a strong sweet raisin hit in the mouth with an almost treacle malt flavour giving way to a rounded bitterness with some lingering roast flavours.

I've made clone recipes in the past and although they have been "in the style of" the beer they were intended to mimic they have never come as close to the real thing as this one has. In fact I'd say mine is better than the shop bought but then I find that most shop bought ales are not a patch on the real thing - often containing metallic flavours that mask the hops and malt that should be there.

This is a very satisfying winter warmer ale (and not a session beer) that I'll definitely be brewing again in the future. Next time I will probably dry hop it and think about using a Yorkshire Ale yeast too.

Thursday, 16 September 2010

Those Yeastie Beasties

In the last few weeks I have been brewing a Red Ale for a small brewing competition. My chosen recipe style was an Irish Red Ale and with this in mind I had ordered a Wyeast Irish Ale yeast. Now normally with liquid yeasts I would take time to grow the yeast on and split it so I get a bit more value for money. Unfortunately this time I was a little unprepared and ended up pitching directly from the Activator bag - a double shame because I'll be making a Four Shades of Stout next and really wanted to use Irish Ale yeast for that one too.

So, when it was time to rack off my Red Ale into a secondary fermenter for finishing and dry hopping, I decided I'd give reclaiming and washing the yeast from the trub.

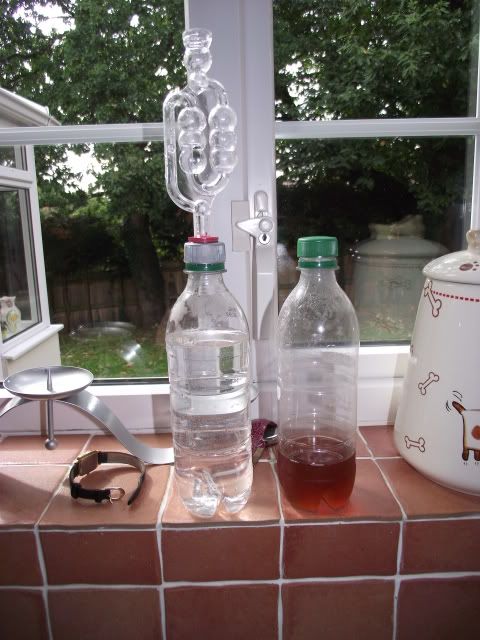
To do this I first sterilised a couple of 500ml PET bottles and a jug. I then boiled and cooled a few 100mls of water to add to the yeast cake to get it into solution. The boiling of the water helps to drive off the oxygen which might be used by the yeast for aerobic action and also sterilises the water ready for use.

Once the water cooled to below around 24oC I poured it into the fermenter and swished it around a bit. I then jugged about 300mls of the liquid into one of the PET bottles, popped the lid on and left in the fridge for about 60 mins to allow the heavier trub to settle out whilst the yeast remained in suspension in the liquid.

At this stage it was just a case of gently pouring the top half of the liquid containing the yeast into the second bottle where it can be capped and put back into the fridge until it's settled out properly. Once settled you should see a nice white / creamy yeast deposit at the bottom. If it still looks contaminated by trub then you can repeat the process of rinsing the yeast and pouring off the debris.

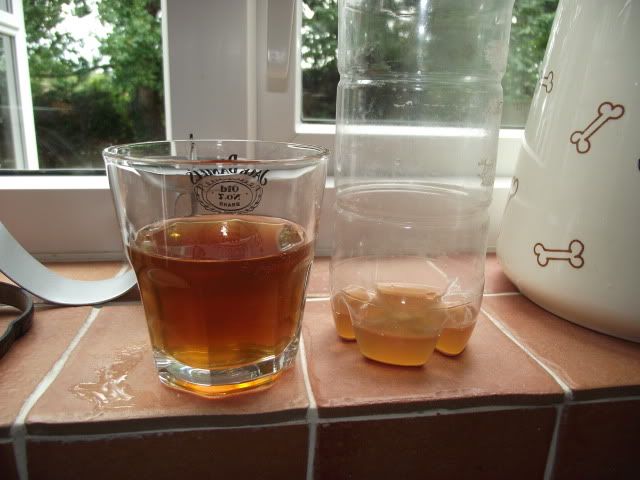
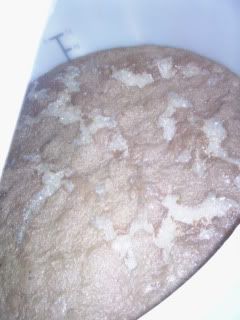
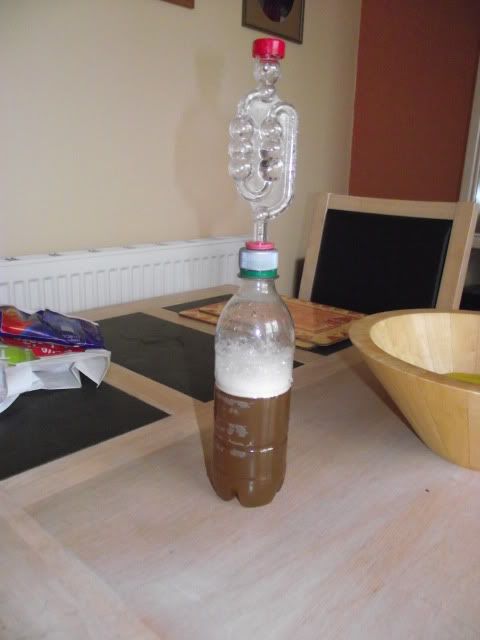
What I ended up with looked like this.


Once collected this will keep in the fridge for a while. To use it, take it out of the fridge a few days before it's needed to gradually stabilise the temperature and so there is enough time to make a yeast starter.
 
I'm planning on using this one at the weekend so here is how I went about making a starter with it.

First of all, clean and sterilise everything that is being used really well. I'm bottling and kegging as well which is why there is more equipment.


I heat about 300ml of water up to around 50oC to allow me to dissolve 40gms of Light Dried Malt Extract into it.


This extract liquid is zapped in the microwave for about 60secs (until it's boiling). This will sterilise the extract liquid.   


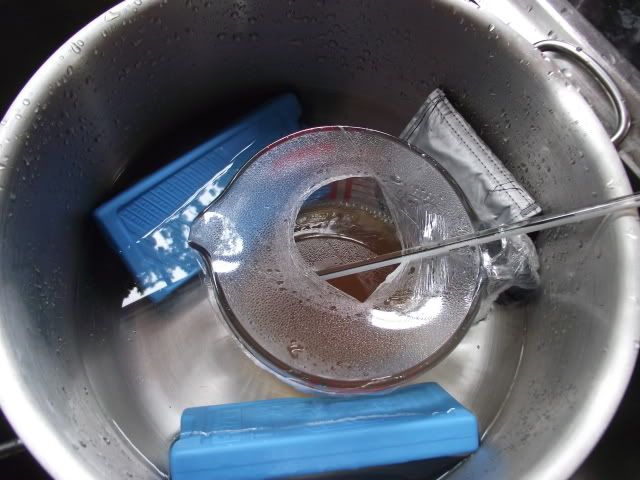
The boiled liquid is cooled in a pan of icy water to get back down to around 22oC.

In the meantime I am preparing the yeast for use. First of all I pour off the excess liquid into a glass. This gives me a chance to smell it and to taste it to make sure there are no signs of an infection.


This one is ok and ready to go. One last job I wanted to do is to bodge a bottle cap so I can use my airlock with it.

And job done - I used a few drill bits and a file to make a hole in the cap so I could fit the rubber grommet in for the airlock to go into. This will come in very useful for the future. Previously I have just used a normal cap loosely fitted so any gases can be released.


I then pour the extract liquid into the yeast bottle and shake well. This gets the yeast off the bottom and into suspension as well as getting some air into it to help the yeast to grow.

Finally I pour the yeast liquid into the new sterilised bottle and cap it with my new airlock cap. This then goes to a warm place for 24-48 hours before being ready for pitching.


There are other methods for reusing, washing and splitting yeasts out there and this is just the way I've done it. I'm looking forward to a decent brew day and pitching a viable and healthy yeast - hopefully ;)

UPDATE: The yeast starter was probably made up a little early and next time I'd probably only make it about 24 hrs before. However, I pitched the yeast starter in my Four Shades Of Stout and there was a good yeast crust within 12 hours of pitching.

Wednesday, 16 June 2010

A break from brewing!

After a few weeks of frantic brewing activity - to get readied for the summer party season - this weekend was a welcome break and a chance to have fun with mates and try some beers crafted by commercial brewers.

The weekend started off with a trip to Bracknell and to the Comedy Cellar, South Hill Park for an evening of laughs. Before the main event starts it's a chance to relax in the sun on the patio of the Atrium Bar where we had a really good burger and chips along with a pint, all for a very reasonable £6.50.

The food has obviously been prepared from the finest ingredients and cooked to perfection. To wash it all down a pint of Fullers Chiswick, a session style ale coming in at 3.5%, it is a golden colour with a fresh hoppy taste coming through the malt. This beer is made with a mixture of Northdown and Challenger hops - my favourite varieties.

I could have stayed on Chiswick all evening, unfortunately when we get into the cellar the choice of drinks goes down hill rapidly. Now the choice is limited to the generic pumps that you see in nearly every pub and club in the highstreet now days, a choice of lager or Guinness. Oh well it was good while it lasted.

The next night it was onto Henley On Thames, the historical hometown of Brakspear Brewery. Sadly they stopped brewing here a while ago in order to concentrate on their "prime" business of running the pub chain and the brewing operations were moved under license to Wychwood brewery. The distinctive Brakspear taste is still present in all their beers and when served correctly it is very drinkable.

With this in mind we decided to watch the England match in a Brakspear pub and the Queens Head looked favourite with it's two 70 inch projected screens providing plenty of viewing experience for the thirsty footy fan. What was worrying was how the large bar was full of taps for the usual suspects - that lager and Guinness bog standard line up - but very few pumps (2 infact) were serving any sort of real ale. There were none of the regular Brakspear beers were available at all, and only two seasonal ales were being served.

I plumped for the Brakspear Pavillion, a pale ale that is produced in support of the Henley Cricket Club to pay for, and the upkeep of, a new cricket pavillion. In fact, 10p from every pint goes towards the new pavillion. And the beer itself was another pleasant pale amber ale with some nice hoppy character to it. It went down so well that during a lull in the play (probably at the point when ITV HD put an advert on just in time to miss a goal) I go back to the bar to get another, only to be told that they have now run out of both taps serving real ale and would I be interested in some lager or Guinness!

So, for me the weekend served to prove that it is becoming harder to find decent pubs that serve or put enough importance into real ales. There are still plenty of pubs out there that are serving the good stuff but it isn't the norm and these establishments have to be sought out.

I might have just been unlucky but I see it in most towns now days, every bar serving the same bland, commercially driven offering to a customer base that is more interested in getting blotto than savouring a well crafted pint.

Monday, 10 May 2010

Competition Update And Other Stuff!

My competition brew has been in secondary fermentation for over a week and I moved it into an environment where it can condition now - probably for up to a month.

I was interested to find out what it was tasting like at this stage though. I was especially keen to try a sample that had been bottled in similar bottles to the competition beers so I could get an idea of the aroma, taste and carbonation from them.

I had bottled some of the beers in some 330ml glass bottles for this reason and on cracking one open there is a fantastic hop aroma, the taste is hoppy with a sweet maltiness and finished off by a bite of bitterness and happily the carbonation is spot on for my tastes. The only disappointment at this stage was the lack of head formation from the bottle, but I know that will improve given time.

The decision to use some chocolate malt to provide additional colour and flavour on top of the crystal malt was a good one and allowed me to use less crystal malt than in previous brews.

So overall I an very happy with the latest incarnation of my Farwelter'd Ale. Hopefully conditioning will only improve it further!


Just over a week ago I had another brew day and decided to try the Graham Wheeler recipe for a beer in the style of Old Speckled Hen. I'd made it before as an extract brew and really wanted to revisit it now I've got more experience and have moved onto full mash brewing. I was especially keen to try the packet of Windsor yeast I had been saving. I thought the extra flavour and sweetness from the yeast would work well with the recipe.

The brew day went very well and the yeast got to work extremely quickly and kept going at a rapid pace for several days and reaching a respectable final gravity (for a medium attenuating yeast) of 1.015. The resulting beer smells and tastes fantastic but is very cloudy. I've heard that this yeast can take a while to settle out and leave the beer bright so I'm considering using auxiliary finings to help out in the keg.

For now though I've racked it off into a secondary fermentor in a slightly cooler environment and added a handful of East Kent Goldings as dry hops. I'll leave it dry hopping until the weekend now and I'll look to keg it up and make room for the next brew day.

Happy Days!

Friday, 30 April 2010

A Long Brew Day Part 3

Fermentation and Bottling :(
We last left off with crashing the temperature of the wort in the boiler down to pitching temperature - around mid 20's oC.

I tend to leave the wort to settle so that the hops form a filter and keep most of the break material out.

While this is happening I would sort out my yeast. This time I'm using a dry yeast and a fairly neutral one to let the hops shine. It's Danstar Nottingham yeast, which I rehydrate in a few hundred mililitres of boiled / cooled water.

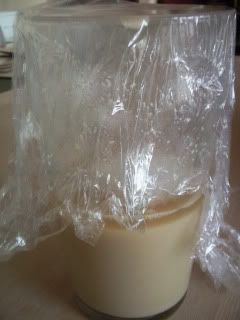
Rehydrating yeast involves sprinkling it onto the water and leaving for about 10 minutes, covered with some clingfilm. The yeast should not all sink to the bottom - if it does then suspect the health of the yeast batch. I tend to mix it back into suspension and see if it foams up after a further 15-20 mins. The clingfilm will rise and mist up if the yeast is viable. Give it a smell as well. You get an idea after a few times as to which yeasts are good or bad.


I also tend to recirculate the first few litres of wort to come from the boiler - similar to the recirculation done at sparging stage.

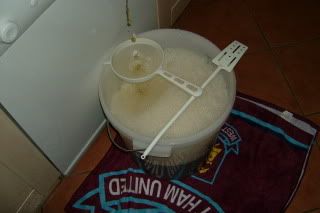
Once the wort is running clear I let if run out of the boiler at height and fall into the fermenting bin underneath. This introduces plenty of oxygen into the wort - which is key to the yeat during the initial stages where it is multiplying like crazy. 

It tends to foam up a bit as a result. I'll also give it a thrashing with a beer paddle to get as much air in as possible. Do you want a flake in that? :)

Now we're ready to pitch the yeast and put it away for fermentation. I try to ferment at a consitent 20 oC. I don't have a brewing fridge like some so I make do with moving the fermentor around or using a heating belt with a timer.

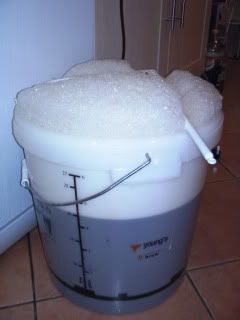
After a few hours the yeast starts to show signs of activity and evently a yeast head builds.

After a few days (3-5) this head dies down and the fermentation continues with less vigour. I tend to sterilise a hydromter at this point and drop it in so I can keep an eye on the specific gravity. Once down to below 1.014 and when I get 3 or more days at the same gravity then it's ready to bottle, although I leave it up to 2 weeks to allow the yeast a chance to do it's 3rd phase in the process of clearing up anything that might cause off flavours in the final beer.

Normally I keg most of the beer and bottle some. This time it's a competition brew so it's going in a mixture of bottles - 330ml glass. 500ml glass and 1ltr PET. This is a long process which I never look forward to. First they all need sterilising, then rinsing then priming.

Now I take a sample and then start filling the bottles.


The hop falvour and aroma is excellent with this brew. It is fairly clear and a reddish colour. Not as bitter as I thought - at least not a harsh astringent type of bitterness - which is good and what I was hoping for. It can only improve from now on and there is plenty of conditioning time before I need to send these off.


So it's wait a few weeks now and then have a sample to see how it's progressing. First samples suggest that this could be good but we'll have to wait and see!